Tag: linux

Removing the Proxmox VE subscription notice

Proxmox VE is an open-source (AGPL v3) virtualization platform for running containers and VMs. It's comparable to a proprietary solution like VMware ESXi.

It can be downloaded and installed completely free of charge, lacking only access to support and other things that more enterprise-focused users care about. For a homelab install, the free version is perfect.

...except for one thing. Each time you log in, you have to click through this dialog:

"You do not have a valid subscription for this server. Please visit www.proxmox.com to get a list of available options."

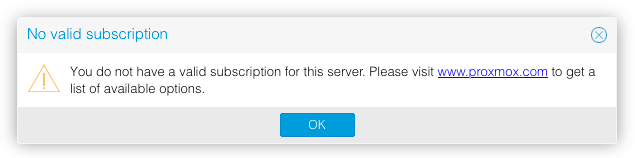
The goal of this post is to walk through developing a solution to automatically remove that notification in any installed version of Proxmox VE, as well as have that removal survive future updates.

To skip to the solution, click here.

Developing a patch

Searching the internet reveals that a few other people (1, 2, 3) have already attacked this problem. All articles point to some code in /usr/share/javascript/proxmox-widget-toolkit/proxmoxlib.js being responsible for the notification so this is where we'll start.

Scanning though that file reveals a function called checked_command(orig_cmd). This function just executes orig_cmd after showing the subscription notification if it determines that you don't have a valid subscription.

Based on this, the goal of this patch will be to make checked_command always execute orig_cmd without bothering to check if there is a subscription at all. As a bonus, this will also speed up the login process since it removes a blocking call to the server1.

Since we want this patch to work for as many versions as possible, it's a good idea to take a look into how this function has changed over time. By looking at the proxmox-widget-toolkit history, we can see that checked_command was originally added in commit 5f93e010. However, it was actually moved from the pve-manager project where it was written for the initial implementation of the subscription notice. By looking at the entire history of this function we can see that while the function implementation has changed slightly over time, the name, arguments, and goal of it has stayed exactly the same.

Given this, as long as we only use the function definition to do the patch, it should work for every version of Proxmox VE to date (and hopefully into the future). Using sed to prepend orig_cmd(); return; to the function should work nicely:

1
sed --in-place 's/checked_command: function(orig_cmd) {$/& orig_cmd(); return;/' /usr/share/javascript/proxmox-widget-toolkit/proxmoxlib.js

This results in the following change:

1
2
-checked_command: function(orig_cmd) {
+checked_command: function(orig_cmd) { orig_cmd(); return;

Notice that the sed script is looking for the function definition followed by a line ending ($). Because the patch is added to the same line, if the command is run again it won't match and won't make any changes, making it safe to blindly run multiple times. This becomes important for automating it later.

Now that we know it works, we should harden it up against whitespace changes by replacing the spaces in the regex with \s* (0 or more whitespace characters):

1
sed --in-place 's/checked_command:\s*function(orig_cmd)\s*{\s*$/& orig_cmd(); return;/' /usr/share/javascript/proxmox-widget-toolkit/proxmoxlib.js

The only thing left to solve is which file checked_command is defined in. Since it used to be a part of the pve-manager project, it's safe to say that it wasn't always stored in /usr/share/javascript/proxmox-widget-toolkit/proxmoxlib.js. It could also move around in the future.

To deal with this, we use grep to find the file that it's defined in, then run the previous command over that file:

1
2
grep --files-with-matches --include '*.js' --recursive --null 'checked_command:\s*function(orig_cmd)' /usr/share/ \
  | xargs --null --no-run-if-empty sed --in-place 's/checked_command:\s*function(orig_cmd)\s*{\s*$/& orig_cmd(); return;/'

Simply run this command on your Proxmox VE server2, refresh the web UI, and the notice should be gone!

Automating it

At this point we have a working command that will remove the subscription notice from any version of Proxmox VE to date. However, after updating the system, there's a chance that a newer version of the file will have overwritten our patched version.

While we could just save the command in a script and manually run it after every update, that's annoying and will definitely be forgotten. Instead, we want to automatically run the command every time the web server starts. This will ensure that it will always be serving a patched version of the file.

Proxmox VE uses systemd to manage the startup of its services. This means that once we find the service that manages the web server, we should be able to make systemd launch a service that applies our patch just before the web server.

The first step is to find the service that manages the web server. Since we know it's running on port 8006, we can use netstat to enumerate all listening TCP ports and grep to filter it down to just the port we're interested in:

1
2
$ netstat --listening --tcp --numeric-ports --program | grep 8006
tcp  0  0  0.0.0.0:8006  0.0.0.0:*  LISTEN  15771/pveproxy

Once we know the PID of the program, running systemctl status <PID> will show the status (including the service name) of the service that's managing it3. In this case it shows that the service is pveproxy.service.

We can now define a service that runs our code, is wanted by pveproxy.service, and must be run before it. Then, whenever systemd starts (or restarts) pveproxy.service, it will make sure to also run our service that applies the patch.

The solution

Putting it all together:

1. Create /etc/systemd/system/no-subscription-notice.service:

 1
 2
 3
 4
 5
 6
 7
 8
 9
10
[Unit]
Description=Remove Proxmox VE subscription notice
Before=pveproxy.service

[Service]
Type=oneshot
ExecStart=/bin/sh -c "grep --files-with-matches --include '*.js' --recursive --null 'checked_command:\s*function(orig_cmd)' /usr/share/ | xargs --null --no-run-if-empty sed --in-place 's/checked_command:\s*function(orig_cmd)\s*{\s*$/& orig_cmd(); return;/'"

[Install]
WantedBy=pveproxy.service

2. systemctl enable --now no-subscription-notice.service

And that's it! The subscription notice should now be gone for good. I'll update this post if it breaks, but that hopefully won't be for a while.

Update

This is still working as of Proxmox VE 7.4-13


  1. Interestingly, the existing solutions I found all patch the code that checks the returned subscription status instead of just not asking about the status at all. Compared to the solution here, this is both more fragile, as well as slower. 

  2. Commands can be run from the web UI (Datacenter -> node -> Shell), via SSH, or just by using a keyboard and monitor hooked up to the server. 

  3. Another way to go from PID or command to service name is to use ps like so: ps --format=unit= <PID> or ps --format=unit= -C <cmd>. Note that this requires your version of ps to be compiled with systemd support (which it is in most systemd-based distros). 


Preventing auto-locking and sleeping by simulating user activity

This post will detail how to simulate activity on your computer in order to prevent it from auto-locking or going into sleep mode. Note that this will usually also prevent the "auto-away" functionality of various chat programs from ever marking you as "away".

Generally you should change your operating system's settings to disable sleeping and auto-locking if possible instead. These methods are for when you don't have the access or permission to change those settings (ie. locked-down devices).

Windows

This method runs a Powershell script on login that toggles scroll lock on/off every minute. Since scroll lock mostly doesn't do anything on modern systems and the script will press it twice to immediately unlock/relock it, this is basically unnoticeable to the user. However, if you have issues simply swap the two {SCROLLLOCK}s in the below command to something else. A full list of special keys can be found here.

  1. Open Explorer (shortcut: Win+E)
  2. Paste %APPDATA%\Microsoft\Windows\Start Menu\Programs\Startup into the location bar and hit enter to navigate there.
  3. Right click in the folder and click New > Shortcut to open the shortcut creation wizard.
  4. Paste the following as the shortcut's location:

    1
    powershell.exe -windowstyle hidden -command "$myshell=New-Object -com \"Wscript.Shell\";while(1){$myshell.SendKeys(\"{SCROLLLOCK}{SCROLLLOCK}\");Start-Sleep -Seconds 60}"
    
  5. Give it any name you like and hit Finish

macOS

This method runs a shell script on login that uses a tool called cliclick to move the mouse one pixel left and right every minute. This is such a small and fast movement that it's usually not noticeable unless you're really looking for it.

  1. Install cliclick from the project website or via brew (brew install cliclick)
  2. Create a script called jiggle with the following contents:
1
2
3
4
5
#!/bin/sh
while true; do
    cliclick 'm:-1,+0' 'm:+1,+0'
    sleep 60
done
  1. Make the script executable (chmod +x jiggle)
  2. Open System Preferences, search for "login items" and hit enter.
  3. Click the + button, select the jiggle script and hit "Add". You should see it appear in the list of programs as a "Unix executable". Check the "Hide" checkbox beside it and exit.

Xorg-based Linux

Much like the macOS version above, this moves the mouse one pixel left and right every minute. If you would prefer to instead use a keyboard-based method like the above Windows version, use xdotool key Scroll_Lock twice instead of the xdotool mousemove_relative * commands in the following script. More special key names for xdotool can be found here.

  1. Install xdotool (usually available via your package manager)
  2. Create a script called jiggle with the following contents:
1
2
3
4
5
6
#!/bin/sh
while true; do
    xdotool mousemove_relative --sync -- -1 0
    xdotool mousemove_relative 1 0
    sleep 60
done
  1. Make the script executable (chmod +x jiggle)
  2. Configure your OS to run the script at login. Usually this would be done through the desktop environment's settings or via something like systemd.

Wayland-based Linux

Some preliminary research suggests that this is possible on Wayland using ydotool as a replacement for xdotool. I don't currently run a Wayland-based setup so I can't test it. If you manage to find a solution for Wayland feel free to send it to me and I'll update the post.


Dynamic DNS client for Namecheap using bash & cron

In addition to running this website, I also run a home server. For convenience, I point a subdomain of cmetcalfe.ca at it so even though it's connected using a dynamic IP (and actually seems to change fairly frequently), I can get access to it from anywhere.

As a bit of background, the domain for this website is registered and managed through Namecheap. While they do provide a recommended DDNS client for keeping a domain's DNS updated, it only runs on Windows.

Instead, after enabling DDNS for the domain and reading Namecheap's article on using the browser to update DDNS I came up with the following dns-update script.

 1
 2
 3
 4
 5
 6
 7
 8
 9
10
11
12
13
14
15
16
17
18
19
20
21
#!/bin/sh

# Abort if anything goes wrong (negates the need for error-checking)
set -e

# Uses drill instead of dig
resolve() {
    #dig "$1" @resolver1.opendns.com +short 2> /dev/null
    line=$(drill "$1" @resolver1.opendns.com 2> /dev/null | sed '/;;.*$/d;/^\s*$/d' | grep "$1")
    echo "$line" | head -1 | cut -f5
}

dns=$(resolve <subdomain>.cmetcalfe.ca)
curr=$(resolve myip.opendns.com)
if [ "$dns" != "$curr" ]; then
    if curl -s "https://dynamicdns.park-your-domain.com/update?host=<subdomain>&domain=cmetcalfe.ca&password=<my passkey>" | grep -q "<ErrCount>0</ErrCount>"; then
        echo "Server DNS record updated ($dns -> $curr)"
    else
        echo "Server DNS record update FAILED (tried $dns -> $curr)"
    fi
fi

It basically checks if the IP returned by a DNS query for the subdomain matches the current IP of the server (as reported by an OpenDNS resolver) and if it doesn't, sends a request to update the DNS. The echo commands are there just to output some record of the IP changing. Maybe I'll do some analysis of it at some point.

To run the script every 30 minutes and redirect any output from it to the syslog, the following crontab entry can be used:

1
*/30 * * * * /path/to/dns-update | /usr/bin/logger -t dns-update

With the script automatically running every 30 minutes I can now be confident that my subdomain will always be pointing at my home server whenever I need access to it.

Note

A previous version of this article used curl -sf http://curlmyip.com to find the server's current IP address. However, after curlmyip went down for a few days, I decided to take the advice in this StackExchange answer and use OpenDNS instead.

© Carey Metcalfe. Built using Pelican. Theme is subtle by Carey Metcalfe. Based on svbhack by Giulio Fidente.